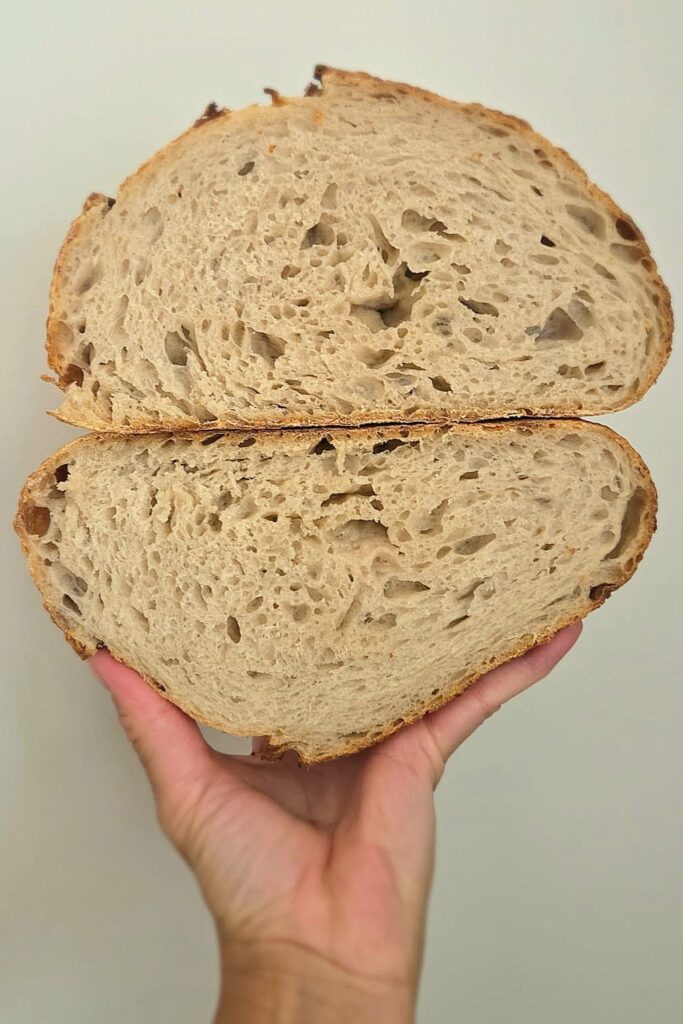
Getting the sourdough baking temperature right is what turns a good dough into a great loaf — the heat and steam in those first minutes decide your crust, your rise and your color. Most home ovens can do it beautifully; you just need to know what the bread needs and when. Here’s how we bake sourdough for a crackly crust and an open crumb, every time.
Why Sourdough Bakes So Hot
Sourdough is baked hotter than most breads, usually starting somewhere around 450–480°F (230–250°C). That high heat does two things that matter enormously in the first ten minutes.
First, it drives oven spring — the final, dramatic rise that happens when the trapped gas expands fast in the heat and the dough leaps upward before the crust sets. A hot oven gives you a bigger, faster spring. Second, high heat is what builds a proper crust: the deep color, the crackle, the flavor that comes from the sugars and proteins browning on the surface. Bake sourdough too cool and you get a pale, soft, disappointing loaf that never quite came alive.
Preheat Longer Than You Think
Before the temperatures matter, the oven has to actually be at them. Give it 45–60 minutes, not fifteen. You’re not waiting for the air to warm up — that happens quickly — you’re waiting for the metal and the oven walls to load up with heat, and that takes far longer than the indicator light suggests.
Preheat the surface the loaf will land on, too. We bake on a perforated baking tray, and it goes in with the oven from the start. A cold tray pulls heat out of the base of the loaf at the exact moment it needs it most, and you can see the difference in how high the loaf climbs.
One more thing worth knowing: your oven dial is probably lying to you. Domestic ovens routinely run 20–35°F (10–20°C) off the set point, and they cycle above and below it rather than holding steady. An oven thermometer costs very little and it’s the only way to find out what “480” actually means in your kitchen. If your loaves come out consistently pale or consistently dark at the recommended time, that’s usually why.
The Best Sourdough Baking Temperature: Two Stages
The reliable way to bake a loaf is in two stages, hot then lower.
Start high — around 480°F (250°C) for the first 20 minutes. This is the oven-spring window, where you want maximum heat and plenty of steam (more on steam below).
Then drop — lower to 400°F (200°C) for the rest of the bake, another 15 minutes or so. By now the loaf has sprung and set its shape; this gentler heat lets it bake through and deepen in color without the crust scorching.
Total bake for a standard loaf lands around 35 minutes, and around 20 for sourdough rolls — but color and internal temperature tell you more than the clock does. Our beginner sourdough bread uses exactly this two-stage bake, start to finish.
Steam Is the Real Secret
If there’s one thing that separates a bakery crust from a home one, it’s steam. For the first part of the bake you want a humid oven, and it changes everything.
Steam keeps the surface of the dough soft and moist for those crucial early minutes. A soft surface can stretch as the loaf springs, so you get a bigger rise and a clean burst along your scoring instead of a crust that sets too early and cracks randomly. It’s also what gives you that glossy, crackly, deeply colored crust. A dry oven sets the surface fast and gives you a duller, tighter loaf.
How we make steam: we put an empty metal roasting tray on the rack below the bread and preheat it along with everything else. The moment the loaf goes in, about a cup of just-boiled water goes into that hot tray, and the door shuts fast. Metal only, never glass — glass can shatter when boiling water hits it.
Some ovens are built to take water poured straight onto the oven floor, and ours is one of them. If you know yours is too, that works just as well. If you’re not sure, use the tray — same steam, no risk.
Either way, you want that humidity for roughly the first 20 minutes, then let it bake dry so the crust can crisp and set. And keep the door shut in the meantime; every time you open it you dump the steam you just built.
Dutch Oven vs. Open Bake
There are two common ways to trap that steam, and both work — it’s worth knowing the difference.
A Dutch oven is the simplest route, especially for beginners. You bake the loaf inside a preheated cast-iron pot with the lid on, and the dough’s own moisture steams it in that sealed space. Lid on for the first 20 minutes, lid off for the rest to color and crisp. It’s close to foolproof and gives excellent results, which is why so many home bakers swear by it. We don’t bake this way ourselves, but it’s a genuinely reliable method and a good option if you want the easiest path to a great crust.
An open bake with steam — the loaf on a hot perforated tray with steam added to the oven — is how we do it. It takes a little more attention to get the humidity right, but it handles multiple loaves easily and gives you full view of the bake. A tray of water on the rack below does the same job the Dutch oven’s lid does: it holds steam around the loaf while it springs.
Neither is better. The Dutch oven is easier; the open bake is more flexible. Either way, the loaf goes in straight from the fridge — a cold, well-shaped loaf into a fully hot oven gives the biggest spring.
How to Know It’s Done
Color gets you close, but the honest answer is a thermometer. A fully baked sourdough reaches an internal temperature of about 96–99°C / 205–210°F in the center. This is the one number we actually check — it takes the guesswork out entirely, and it’s the difference between a loaf that’s set and one that’s still gummy in the middle.
If you don’t have a thermometer, go by color and sound: a deep, rich brown crust, and a hollow knock when you tap the bottom of the loaf. But a probe in the center is faster, surer, and worth owning if you bake regularly.
If it reads low, put it back in. A few more minutes at 200°C won’t hurt anything.
How to Know It’s Done
Color gets you close, but the honest answer is a thermometer. A fully baked sourdough reaches an internal temperature of about 205–210°F (96–99°C) in the center. This is the one number we actually check — it takes the guesswork out entirely, and it’s the difference between a loaf that’s set and one that’s still gummy in the middle.
If you don’t have a thermometer, go by color and sound: a deep, rich brown crust, and a hollow knock when you tap the bottom of the loaf. But a probe in the center is faster, surer, and worth owning if you bake regularly.
If it reads low, put it back in. A few more minutes at 400°F (200°C) won’t hurt anything.
Then Let It Cool
This is the hardest instruction in bread and the easiest to follow: don’t cut it hot. The crumb is still setting as the loaf cools, and slicing into a warm loaf gives you a gummy, compressed interior — you’ll have baked it perfectly and then undone it with a knife. Give it at least 2 hours on a wire rack before you cut. The crust will crackle and sing as it cools, which is the best sound in baking and worth the wait.
If you’ve ever had a loaf that looked perfect and tasted gummy, this — not your starter — was probably the reason. And when you’re down to the last third of the loaf, our leftover sourdough ideas make sure none of it goes to waste.
Tools that make the difference
Heat and steam are most of the battle, and a few tools make both easier to control.
- A perforated baking tray — what we bake on; the holes let heat reach the base so the bottom crust sets properly
- A metal roasting tray — your steam source on the rack below. Metal only, never glass.
- A digital probe thermometer — check the internal temperature and never cut into a gummy loaf again
- An oven thermometer — cheap, and it tells you what your oven’s numbers actually mean
- A Dutch oven — the simplest way to trap steam for a bakery crust, if you’d rather not manage steam yourself
Sourdough for Beginners · Step 9 of 9