Walnut Sourdough Bread
Walnut sourdough bread is our everyday whole grain sourdough bread with 200 grams of walnuts folded through it — nuts in every single slice. The one step most recipes leave out is blanching the walnuts first, which takes the bitterness out before they ever reach the dough. Everything else is the slow overnight ferment you already know.
Walnut Sourdough Bread
Ingredients
Equipment
Method
- Blanch the walnuts. Bring a small pot of water to a boil, add the walnuts and boil for 1–2 minutes. Drain, rinse under cold water and drain well. Spread them out on a towel while you mix the dough. One blanch is enough, and they don't need to be bone dry — damp is fine.
- Feed your starter the morning you bake (or the night before) so it's lively when you mix — it should have roughly doubled and look domed and bubbly. A spoonful floating in water is a good extra sign, but a whole grain starter can sink even when it's ready, so trust the rise first.
- Mix the dough. In a large bowl, whisk the starter into the lukewarm water to loosen it. Add all three flours and mix by hand until no dry flour remains — you'll have a shaggy, sticky dough. Hold the salt back for now. Cover and rest 1 hour at room temperature.
- Add the salt. Sprinkle it over the dough and work it in thoroughly, squeezing and folding until fully incorporated. The dough will tighten up slightly.
- Stretch and fold — every 30 minutes, at least 4 times — adding the walnuts on the second set. With a wet hand, grab one side of the dough, stretch it up, and fold it over the center; turn the bowl a quarter turn and repeat around the whole dough (four pulls = one set). On the second set, flatten the dough, scatter the walnuts over the surface and fold them in; the remaining sets will distribute them evenly. Our Stretch & Fold Timer keeps track of the sets for you.
- Bulk ferment until risen. After the folds, cover and let it rise at room temperature until it's grown by about 30–50%, looks domed and jiggly, and shows bubbles on top and along the sides. Depending on your kitchen this is roughly 4–6 hours total from mixing — the walnuts can slow it down a little, so give it the time it needs. Watch the dough, not the clock; our guide to bulk fermentation shows you what to look for.
- Preshape and shape. Tip the dough onto a lightly floured surface and gently round it into a loose ball. Leave it uncovered for 20–30 minutes so the gluten relaxes. Then fold it into a taut round, pulling it toward you against the counter a few times to build surface tension — more on that in how to shape sourdough. Press any walnut that pokes out back into the dough as you go.
- Into the banneton. Line your proofing basket with a cloth and dust it generously with rice flour, then set the dough in seam-side up.
- Cold retard overnight. Cover and refrigerate 12–16 hours. The slow, cold rise builds flavor and firms the dough so it's easier to score and springs higher in the oven.
- Preheat, hot. About 45–60 minutes before baking, heat the oven as hot as it goes — around 480°F (250°C) — with your perforated baking tray on the middle rack and an empty metal roasting tray on the rack below. Both metal, never glass — glass can shatter when the water hits it.
- Turn out and score. Turn the cold dough out onto a sheet of parchment, seam-side down. Score it once, decisively, about ½ inch (1 cm) deep — see how to score sourdough.
- Bake with steam. Slide the loaf, still on its parchment, onto the hot baking tray in one quick movement. Immediately pour about 1 cup of just-boiled water into the roasting tray below and shut the door fast. Bake at 480°F (250°C) for 20 minutes.
- Finish in dry heat. Take the roasting tray out, drop the oven to 400°F (200°C), and bake another 15 minutes until the crust is deep brown and the center reads 205–210°F (96–99°C). Our guide to sourdough baking temperature explains the heat and steam in detail.
- Cool completely. Cool on a wire rack for at least 2 hours before slicing. A nut loaf holds moisture longer than a plain one — cutting early gives you a gummy crumb.
Notes
- Damp walnuts are fine. Straight from the towel into the dough — no toasting, no drying. Just don’t tip the draining water in with them.
- Sticky is right. The whole grain flours drink up water, so this sits around 73% hydration. It’ll feel tacky — that’s exactly what you want.
- Nuts slow things down. Walnut tannins are mildly hostile to gluten and to your starter, so this dough can ferment a touch slower and feel a little slacker than the plain loaf. Judge the dough, not the clock.
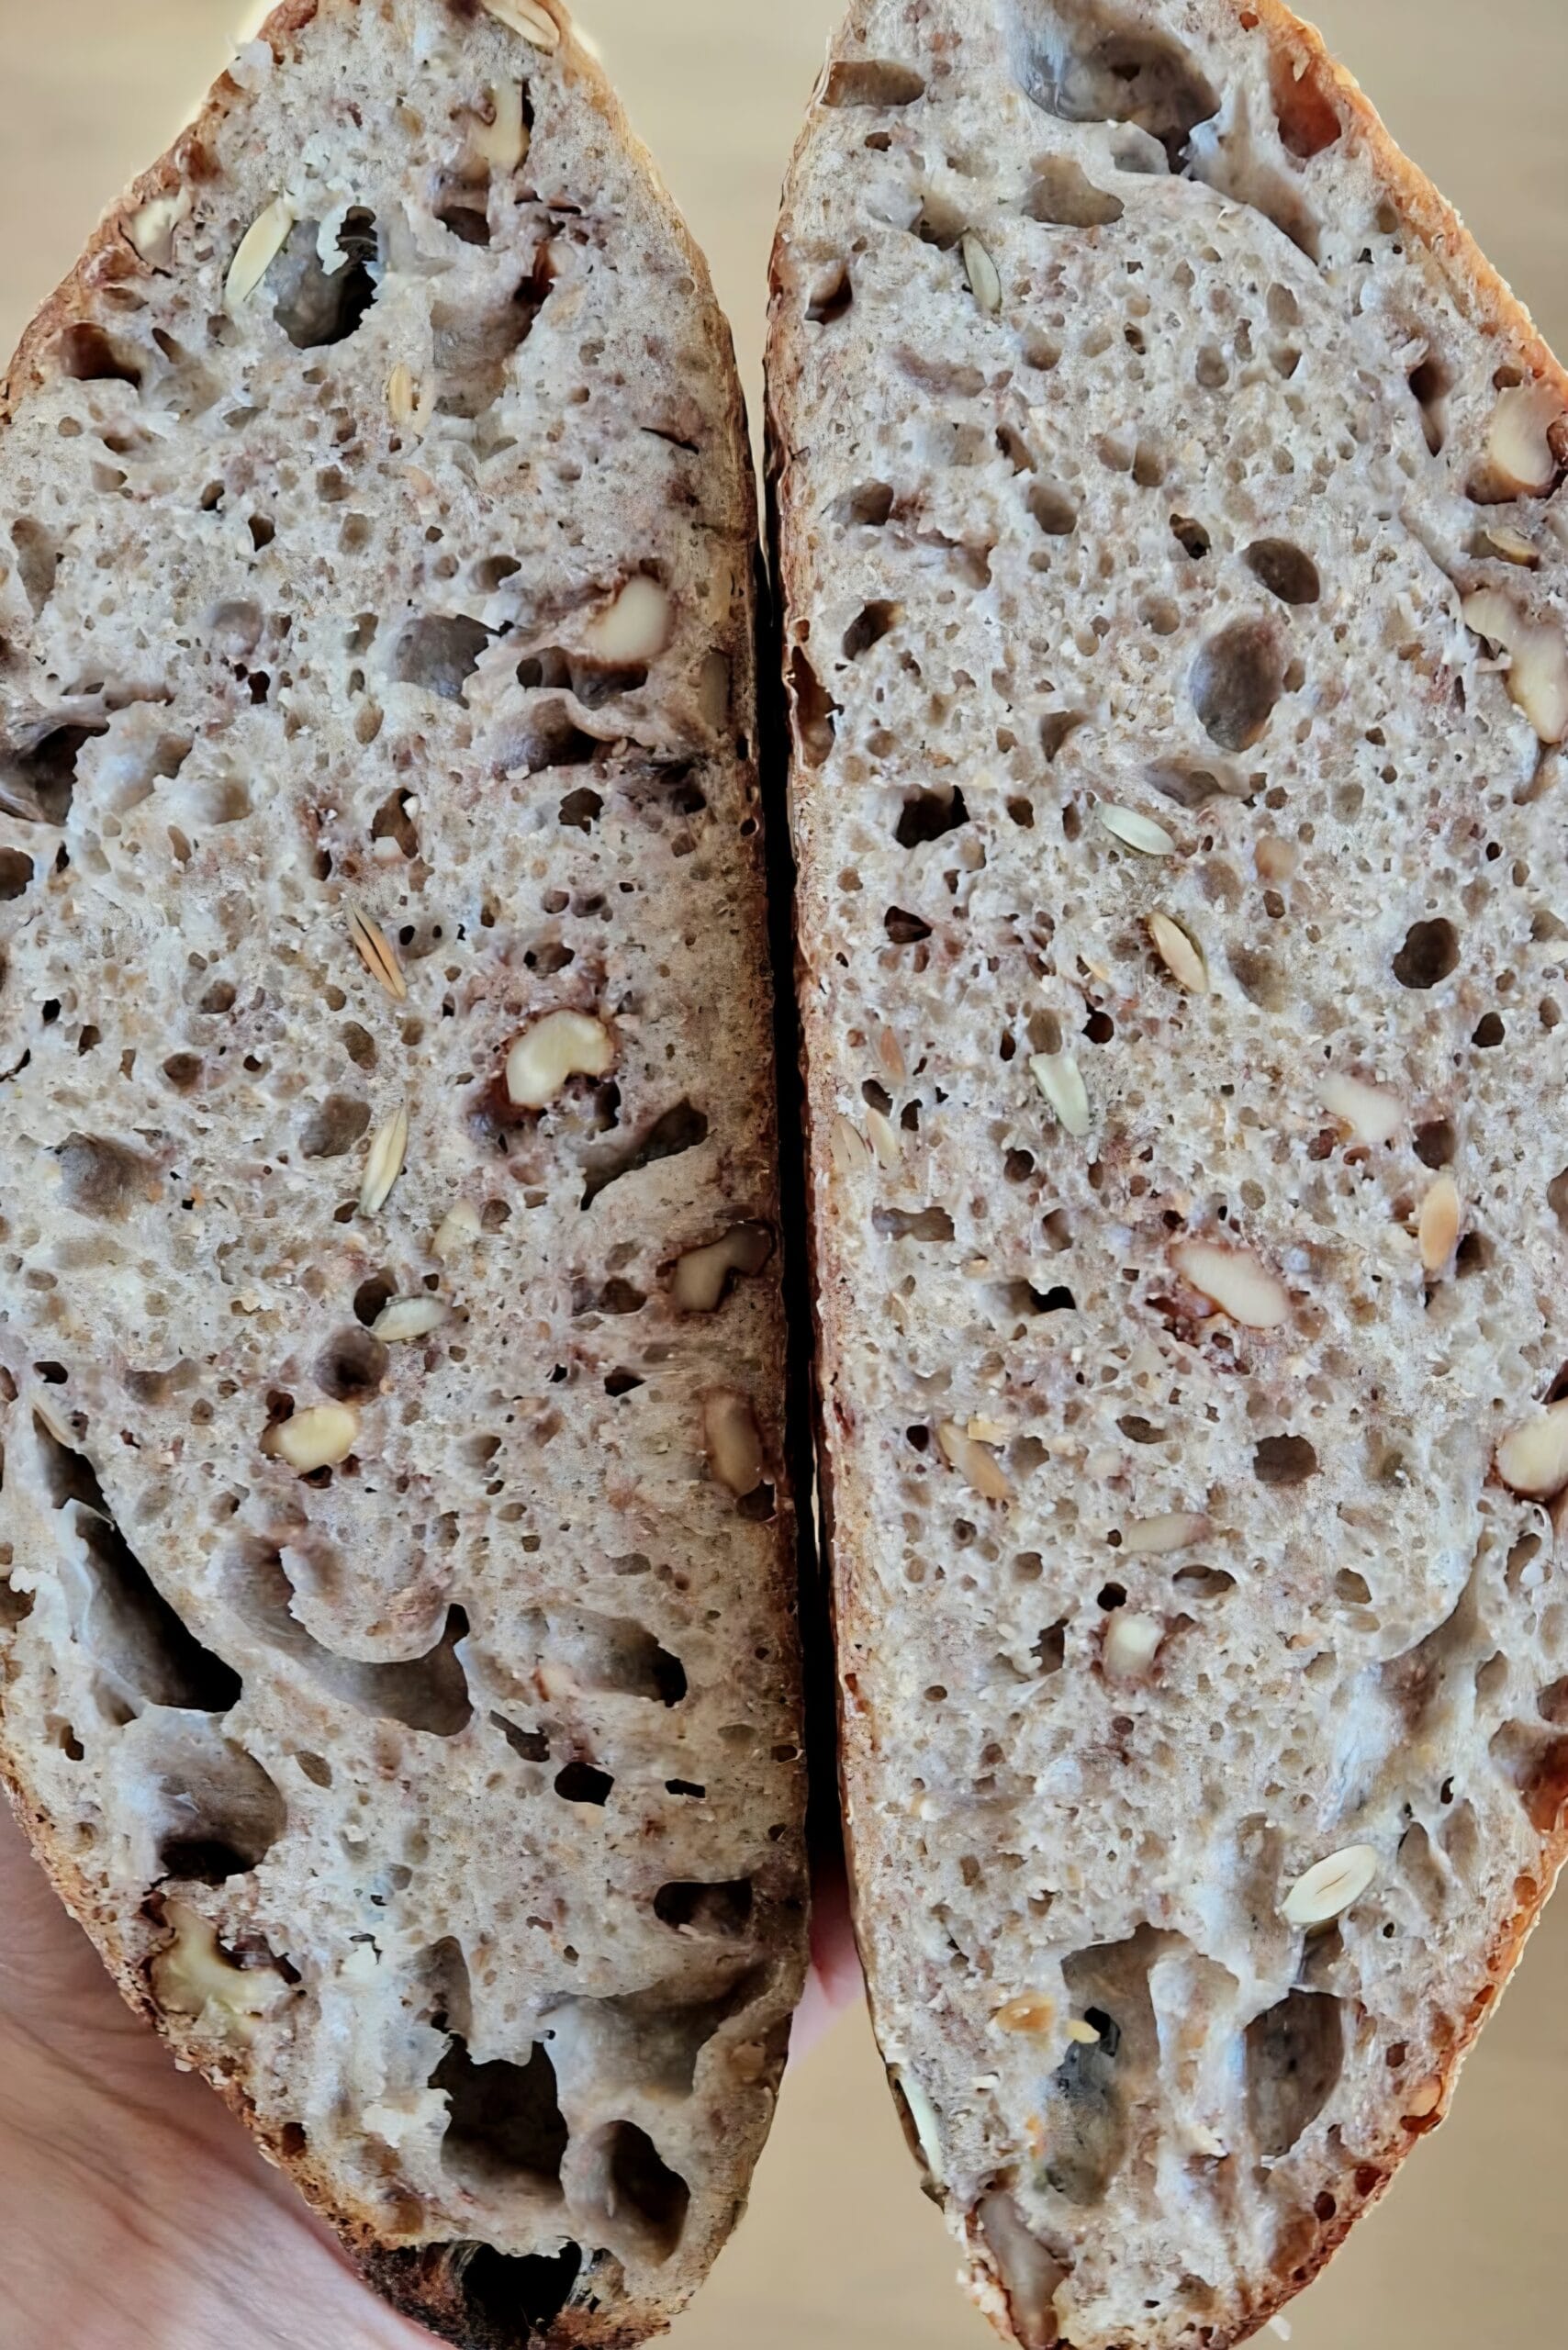
- A lavender tint is normal. Walnut tannins can turn the crumb around the nuts faintly purple-grey. Blanching reduces it; it doesn’t affect the flavor.
- Weigh, don’t scoop. A digital scale is the single biggest upgrade for consistent sourdough; the cup measures above are approximate.
Blanch the Walnuts — the Trick to a Walnut Sourdough That Isn’t Bitter
Walnut bitterness lives in the thin brown skin around the kernel, where most of the nut’s tannins sit. In a salad you barely notice it. In a loaf that ferments for 20 hours, it concentrates, and you end up with a bread that has a hard, astringent edge behind the nuttiness.
A one to two minute boil pulls a lot of it out. Drain the walnuts and you’ll see the water has gone brown — that’s exactly what you don’t want in your crumb. Rinse, drain, and they’re ready.
One blanch does it, and there’s no need to dry them out afterwards. Damp walnuts go straight into the dough. A bone-dry walnut half tears wet dough as you fold it in; a slightly damp one doesn’t.
Folding 200 g of nuts into a wet dough
Two hundred grams is a lot of walnuts — about 36% of the flour weight — and adding them at the wrong time makes a mess. Two rules:
Add them on the second set of folds, not at mixing. The dough needs to build some strength on its own first. Fold them in too early and the nuts cut the gluten as it’s trying to form. (Heavier, wetter inclusions like the onions and cheese in our caramelized onion sourdough wait until the last set; walnuts are light enough to go in earlier.)
Spread, don’t dump. Flatten the dough out, scatter the walnuts over the surface, then fold. The remaining sets will distribute them for you. Working them in all at once means squeezing the dough, which is what tears it.
When you shape the loaf, run your hand over it and press any walnut that’s poking out back into the dough. Nuts on the surface go from toasted to burnt long before the loaf is baked through — a few dark ones taste fine, they just look darker than the crust.
Storing Walnut Sourdough Bread
Cut side down on a board, no plastic, at room temperature. From day two, a linen bread bag keeps the crumb moist while the crust stays dry. The walnuts hold moisture, so this loaf keeps a little longer than the plain one — good for three days, still fine on the fourth.
For longer than that, slice it and freeze it in a bag; slices toast straight from the freezer. It’s at its best with cheese — a sharp one, or Norwegian brown cheese sliced thin — and when the last of it goes firm, our leftover sourdough ideas put it to work.
Make it your own
The dough doesn’t care what you fold into it, as long as the weight stays around 200 g:
- Toast the walnuts after blanching, if you want them crisper — 8–10 minutes at 350°F (175°C), cooled before folding in. We don’t bother; most of that crunch comes back in the bake anyway.
- Hazelnuts — blanch and rub the skins off, then use them whole. Sweeter and less tannic than walnuts.
- Pumpkin or sunflower seeds — soak them in warm water for 30 minutes first, otherwise they pull water out of the dough and dry the crumb.
- Walnuts and dried figs, half and half — a good loaf for cheese.
The blanching is specifically a walnut problem. Hazelnuts and seeds don’t need it.
More Nordic bakes you’ll love
- Oat Sourdough Bread with Toasted Oats — the same everyday loaf, with a soaker of popcorn-sweet toasted oats
- Danish Rye Bread (Rugbrød) — dense, dark and seeded, for when you want to go fully Nordic
- Beginner Sourdough Bread — start here if this is your first sourdough