Sourdough Baguettes
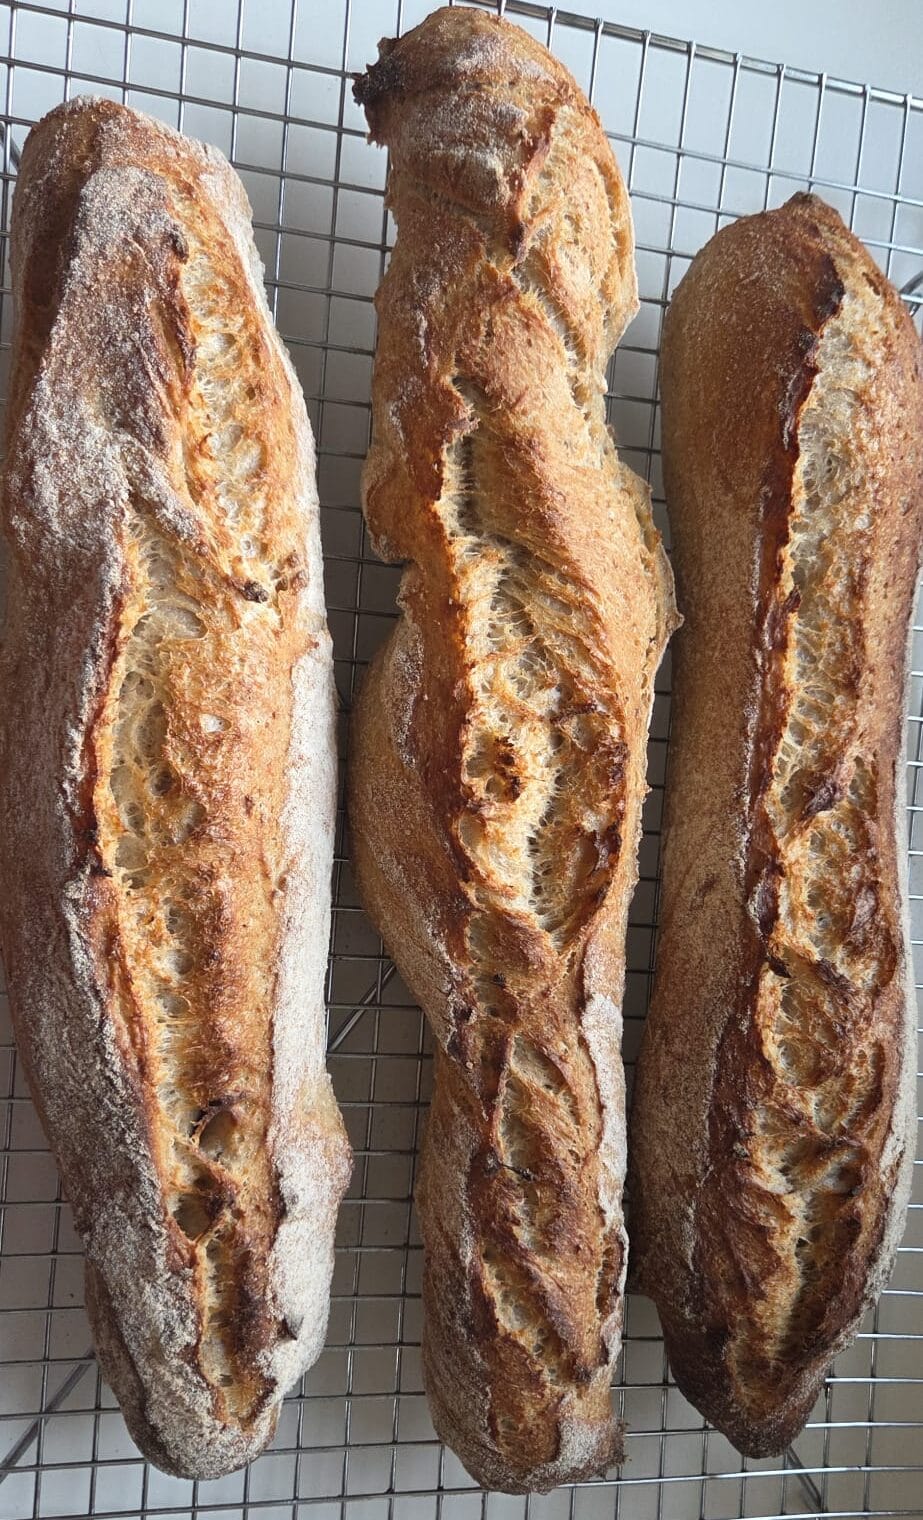
Sourdough baguettes bring the crackle of a French boulangerie to your home oven — long, rustic, and shatteringly crisp. They use the same naturally leavened dough as our whole grain sourdough bread, made a little firmer so it shapes into logs by hand. Divide, roll, score, and bake — no baguette pan required.
Sourdough Baguettes
Ingredients
Equipment
Method
- Feed your starter the morning you bake (or the night before) so it's lively when you mix — it should have roughly doubled and look domed and bubbly. A spoonful floating in water is a good extra sign, but a whole grain starter can sink even when it's ready, so trust the rise first.
- Mix the dough. Whisk the starter into the lukewarm water to loosen it. Add all three flours and mix by hand until no dry flour remains. Hold the salt back for now. Cover and rest 1 hour. (With the extra flour this dough is firmer and less sticky — that's what lets you roll it into logs by hand.)
- Add the salt. Sprinkle it over and work it in thoroughly until fully incorporated.
- Stretch and fold — every 30 minutes, at least 4 times. Wet hand, grab one side, stretch it up and fold over the center; turn the bowl a quarter turn and repeat around (four pulls = one set). Cover, rest 30 minutes, repeat. Our Stretch & Fold Timer keeps track of the sets for you.
- Bulk ferment until risen. Cover and let it rise at room temperature until grown by about 30–50%, domed and jiggly with bubbles on top and sides — roughly 4–6 hours total from mixing. Watch the dough, not the clock; our guide to bulk fermentation shows what to look for.
- Cold retard overnight — as a mass. Don't shape yet. Transfer the dough straight into the fridge for 12–16 hours, left as one piece in a floured proofing basket or a lidded tub if you don't have a basket. You'll shape the baguettes right before baking.
- Preheat, hot. About 45–60 minutes before baking, heat the oven as hot as it goes — around 480°F (250°C) — with two trays inside: your perforated baking tray (or a regular baking sheet) on the middle rack, and an empty metal roasting tray on the rack below. The baking tray needs to be properly hot before the baguettes land on it; the roasting tray is what makes your steam. Both metal, never glass — glass can shatter when the water hits it.
- Divide. Tip the cold dough onto a floured counter. With a bench scraper, divide it into 2 fatter or 3 slimmer pieces.
- Shape into logs. Gently fold and roll each piece into a log without pressing out all the air, tapering the ends. Rustic is the goal — don't fuss over uniformity. Make them the length of your baking tray; home ovens rarely fit a full-length baguette, so shorter "demi" baguettes are perfect. Set them seam-side down on parchment. The tension principles are the same as for a round loaf — see how to shape sourdough.
- Score. Make 3–4 long diagonal slashes down each baguette with a bread lame, holding the blade almost flat — that low angle is what opens into the classic ear.
- Bake with steam. Slide the baguettes, still on their parchment, onto the hot baking tray on the middle rack — parchment and all, in one quick movement. Immediately pour about 1 cup of just-boiled water into the hot tray below (stand back), and shut the door fast. Bake at 480°F (250°C) for 12 minutes.
- Finish in dry heat. Take the roasting tray out, drop the oven to 400°F (200°C), and bake another 8 minutes or so until deep golden and crisp. About 205°F (96°C) internally — thinner baguettes may be ready a touch sooner.
- Cool on a wire rack for at least 20–30 minutes. Baguettes are at their best the day they're baked — see the post below for keeping them crisp.
Notes
- Firmer dough shapes better. At ~67% hydration this dough rolls into logs far more easily than a wet boule dough.
- Fit your oven. Shape to the length of your tray — two shorter baguettes beat one that won’t fit.
- The ear. Hold the lame at a low angle and score each slash in one confident stroke; hesitation tears the crust instead of opening it. More on angle and depth in how to score sourdough.
- No final proof. Shaping cold and baking right away keeps them rustic; the spring comes from the overnight ferment.
About the dough (and the flour)
This is our everyday sourdough dough with 50 g of extra flour, which firms it up for hand-shaping. It’s a mix of sifted and whole grain wheat — about 40% whole grain. For the full breakdown on the flour, and how to adapt it outside Norway, see our whole grain sourdough bread. If you’re still getting a feel for sourdough, bake our beginner sourdough bread first — baguettes are easier once you can read the dough.
Shaping Sourdough Baguettes at Home
You don’t need a baguette pan or bakery skills — just a bench scraper and a floured counter. Divide the cold dough, fold and roll each piece into a rustic log, and taper the ends. The one rule that matters at home: shape them to fit your oven. A full 26-inch (65 cm) baguette won’t fit most trays, so make shorter demi-baguettes and don’t chase perfection — rustic is the whole look.
Scoring for the perfect ear
The ear — that raised, curled ridge along the top — comes from three things: a confident low-angle score, a screaming-hot oven, and steam in the first minutes. Hold the lame nearly flat — lower than you would for a round loaf, because a baguette is thin and the flap needs to peel sideways rather than burst upward — and make 3–4 overlapping diagonal slashes down the length, cutting each in a single stroke. The steam keeps the crust soft just long enough for the scored flaps to lift before they set. Our guides to scoring and baking temperature go deeper on both.
Keeping Baguettes Crisp
Baguettes stale faster than a round loaf — there’s more crust and less crumb to hold moisture. Leave them uncovered on a board for the day they’re baked; a bag softens the crust within hours. Anything you won’t eat that day, freeze whole or halved the moment they’ve cooled, then crisp them straight from frozen in a 400°F (200°C) oven for 8–10 minutes. A day-old baguette can be brought back the same way, with a quick rinse under the tap first — the method is in our leftover sourdough ideas.
More Nordic bakes you’ll love
- Sourdough Rolls — the same crusty bake in individual pieces, with no shaping to worry about
- Sourdough Focaccia — when you want a wetter, softer dough and an open, oily crumb
- Whole Grain Sourdough Bread — the everyday loaf this dough comes from